Lab 15: Character LCDs
There are many different types of liquid-crystal displays (or “LCDs”) that have been made over the years. The one in your kit is an old type that has been around for decades and is more like a digital watch than a modern phone screen (even though both are technically LCDs). They use a backlight to light up the entire screen, and then use an electrically controlled material to selectively block out the light and create darker colors.
Example Program
Connect the character LCD to your Arduino by making the following connections with the long M-to-F jumper wires included in your kit, and then upload the program to your Arduino:
| Character LCD | Arduino Pin |
|---|---|
| GND | GND |
| VCC | 5V |
| SDA | A4 |
| SCL | A5 |
#include <Wire.h>
#include <hd44780.h>
#include <hd44780ioClass/hd44780_I2Cexp.h>

hd44780_I2Cexp lcd;

void setup()
{
    // Initialize the LCD:
    lcd.begin(16, 2);

    // Print an unchanging message on the top row of the LCD:
    lcd.print("I have been on");
}

void loop()
{
    // Re-print the changing message on the bottom row of the LCD:
    lcd.setCursor(0, 1);
    lcd.print("for ");
    lcd.print(millis() / 1000);
    lcd.print(" seconds.");
}
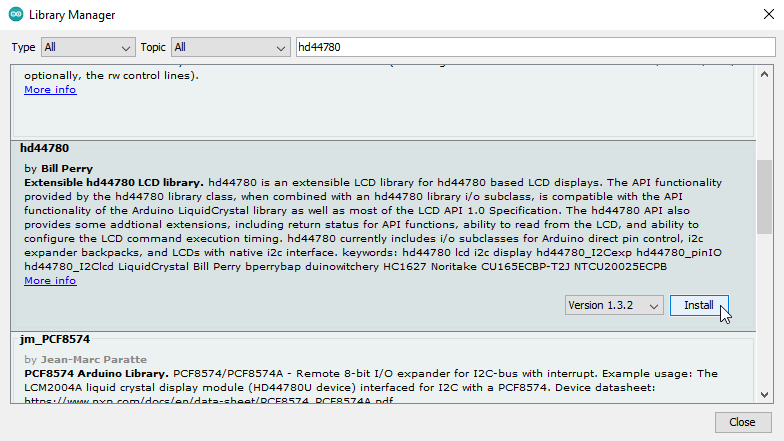
Before you can compile and upload this program to your Arduino you will need to open the library manager in the Arduino IDE (“Tools > Manage Libraries…”, or Ctrl+Shift+I), type “hd44780” in the search bar, and install the “hd44780” library by “Bill Perry”.

Once you have installed the library and compiled and uploaded the program you should see some text printed on the LCD screen. If you do not, quickly double-check your wiring. If everything is wired correctly and the backlight is on but you do not see any text, you probably need to adjust the contrast on the LCD screen.
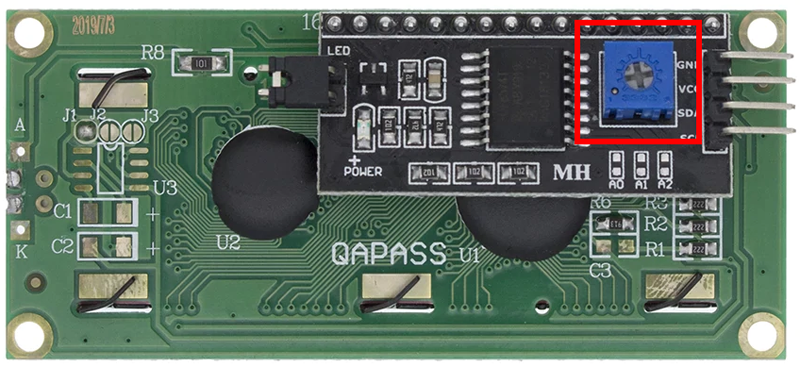
Get a small Phillips head screwdriver and use it to adjust the blue potentiometer on the circuit board on the back of the LCD screen. If you turn it all the way clockwise you will see all of the pixels (even the ones that are off), and if you turn it all the way counterclockwise you will see nothing but the backlight. Find a happy medium where the text is clearly visible without the pixels that are off also being visible.

Learn More
-
Printing text to the LCD is a lot like printing text to the serial monitor, except that you have more control because you can move the cursor around and print new text over top of old text. This allows you to create things like user interfaces and animations. Check out the deep dive at the end of this lab for a full list of functions supported by the hd44780 LCD library.
-
The specific screen in your kit is called a dot-matrix display because it uses a grid of dots (or pixels) to create an image. Compare this with the 7-segment display from Lab 12, which was only able to display digits.
-
On second thought, that maybe was not entirely true; the specific screen in your kit is not truly a dot-matrix display because it cannot display arbitrary pixel patterns. Instead, it is grouped into two rows of 16 characters, each consisting of a 5x8 sub-grid of pixels that is used to display a single digit, letter, or symbol. These are commonly called character LCDs and are still much more versatile than 7-segment displays.
Assignment
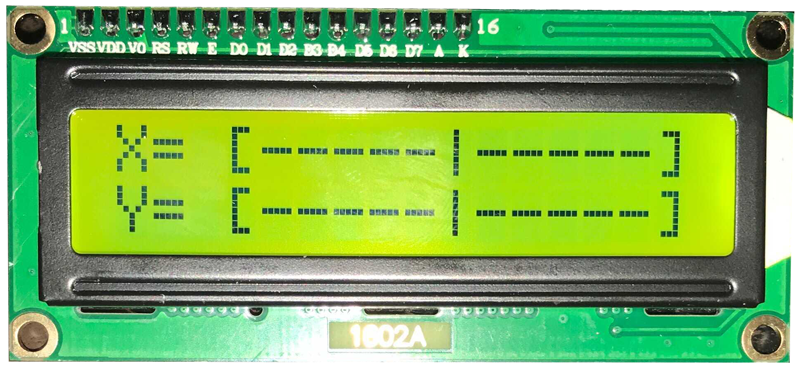
Use one of the sensors from a previous lab (temperature sensor, X/Y joystick, ultrasonic rangefinder, photoresistor, potentiometer, etc.) and create a “dashboard” on the LCD that visually displays and updates the information from the sensor in real-time. You should do something more interesting than merely printing out a number, like this example below that shows the position of the X/Y joystick as two animated meters, one for each axis. Be creative!
