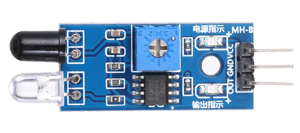
Proximity sensors detect the presence of objects or obstacles. They work by shining an infrared LED straight ahead and measuring how much light is reflected back. Infrared light is invisible to humans but can be seen by certain electronic sensors, and is used in various applications including television remote controls and night-vision cameras.
Use three male-to-female jumper wires to connect a proximity sensor to your Arduino as follows:
| Proximity Sensor | Arduino |
|---|---|
| OUT | 2 |
| GND | GND |
| VCC | 3.3 (NOT 5V!) |
It is VERY IMPORTANT that you connect the proximity sensor's VCC pin to "3.3" and not "5V". You will destroy the proximity sensor if you connect it to the "5V" pin.
void setup()
{
pinMode(2, INPUT);
Serial.begin(9600);
}
void loop()
{
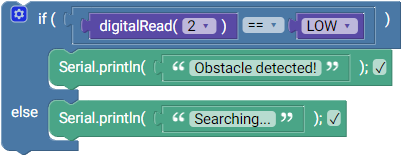
if (digitalRead(2) == LOW)
{
Serial.println("Obstacle detected!");
}
else
{
Serial.println("Searching...");
}
}
If you open the serial monitor in the Arduino IDE you should see a stream of messages that change when you place your hand in front of the proximity sensor.
The proximity sensors that we are using in this class output a digital signal that is HIGH by default and goes LOW when an obstacle is detected within a certain distance. You can adjust this distance by turning the "trimmer potentiometer" on the sensor with a small screwdriver. There is an LED on the sensor that indicates whether or not it is currently triggered, which can be useful for fine-tuning the distance.
Create a "personal space detector" with three LEDs (green, yellow, and red) that is normally green but switches to yellow and then to red as you move your hand closer. You will need to use two proximity sensors for this, each set to a different trigger distance. Make sure that they are both connected to the "3.3" pin and NOT the "5V" pin!