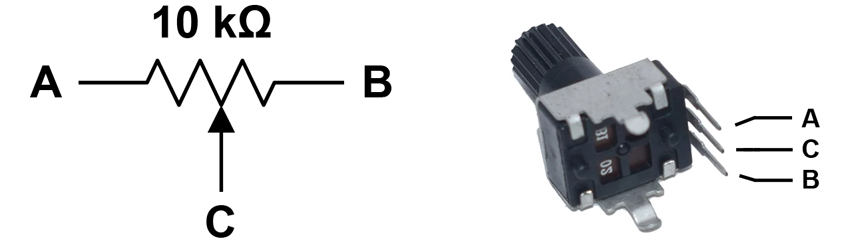
A potentiometer is a special type of resistor with a knob that can be turned to change the resistance. In this lab we will use it as an input device, like a switch or button. Unlike a switch or button, however, the potentiometer has many possible positions, which we can read as a number between 0 and 1023 instead of merely HIGH or LOW.
Assemble the following circuit and upload the program to your Arduino:
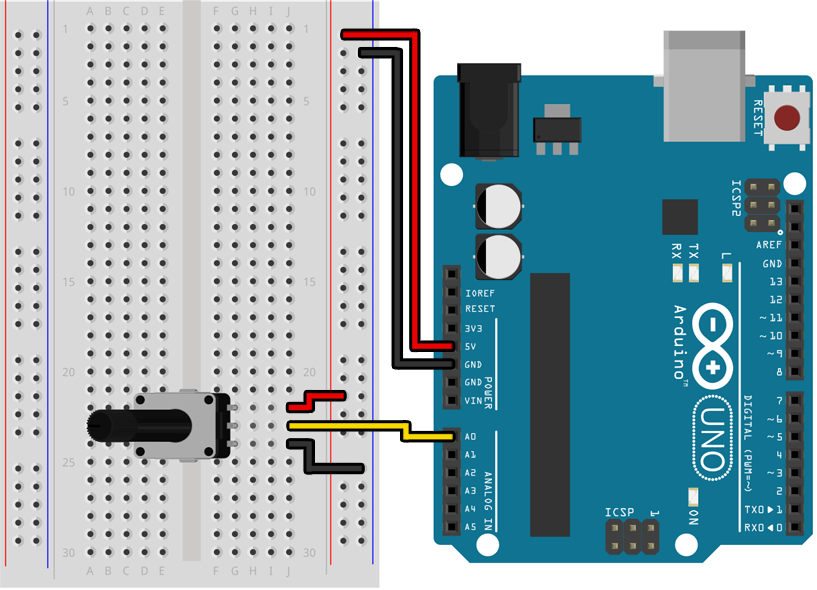
Depending on which type of potentiometer you grabbed when you assembled your kit, you may need to solder wires to it before you can connect it to your breadboard.

void setup()
{
    Serial.begin(9600);
    pinMode(A0, INPUT);
}

void loop()
{
    Serial.println(analogRead(A0));
}
If you open the serial monitor in the Arduino IDE you should see a stream of numbers being printed to it, with values between 0 and 1023 that change as you twist the knob.
Before you use a pin as an analog input by calling analogRead() you must make sure the pin is configured as an INPUT (and not INPUT_PULLUP) in your setup() function. Using INPUT_PULLUP will cause analogRead() to return inaccurate values. In the example above, that looked like this:

pinMode(A0, INPUT);
Note that only pins A0 through A5 can be used with analogRead(). For digitalRead() and digitalWrite(), like when hooking up LEDs, you may still use pins 2 through 12.
In the previous lab we used an if/else statement with digitalRead() to do one of two different things depending on the state of a switch or button:
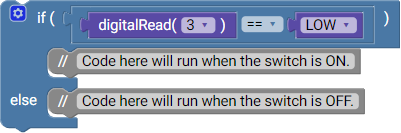
if (digitalRead(3) == LOW)
{
    // Code here will run when the switch is ON.
}
else
{
    // Code here will run when the switch is off.
}
We can do something similar with the value of analogRead() by using comparison operators like < (less than) and > (greater than). Keeping in mind that the range of values returned by analogRead() is somewhere between 0 and 1023, we can use this to turn an LED on and off based on the position of the potentiometer, assuming that an LED is connected to pin 2:
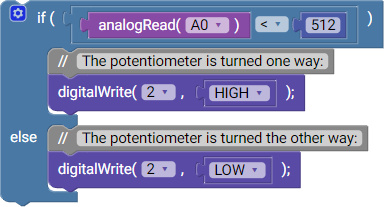
if (analogRead(A0) < 512)
{
    // The potentiometer is turned one way:
    digitalWrite(2, HIGH);
}
else
{
    // The potentiometer is turned the other way:
    digitalWrite(2, LOW);
}
If you want to combine multiple tests together, like when checking if the potentiometer is within a specific range, you can use the && (AND) and || (OR) symbols:
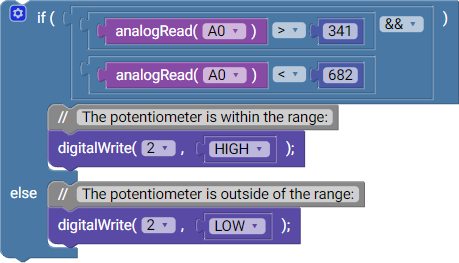
if (analogRead(A0) > 341 && analogRead(A0) < 682)
{
    // The potentiometer is within the range:
    digitalWrite(2, HIGH);
}
else
{
    // The potentiometer is outside the range:
    digitalWrite(2, LOW);
}
Create an "LED bar graph" using at least 4 LEDs that "fills up" as you turn the potentiometer. At one end of the potentiometer's range all of the LEDs should be off, and then as you turn it the other way they should turn on one by one until the potentiometer is at the other end of its range and all the LEDs have turned on.