When we moved into our current office over two years ago I found an old electronic typewriter and immediately claimed it so that I could hack it to do something fun. I then proceeded to literally leave it in a corner, largely because I kept forgetting to bring the right sized Torx bit to our hackathons. I'm on summer vacation this week and needed a project, so this ended up being it!
I had originally intended to turn it into a USB teletype using an Arduino, but when I needed to use the UART for something else I ended up building a teletype-esque BASIC terminal, something I had originally conceived of after visiting the Living Computer Museum. I had never used an actual teletype before, but there was something magical about programming on typewriter and having it output directly to paper. Although it's not the same without a PDP-11 towering over you, I think this comes pretty close!
If you live around Seattle and haven't visited the Living Computer Museum you really ought to go. Admission is inexpensive and they let you play with all of the computers!
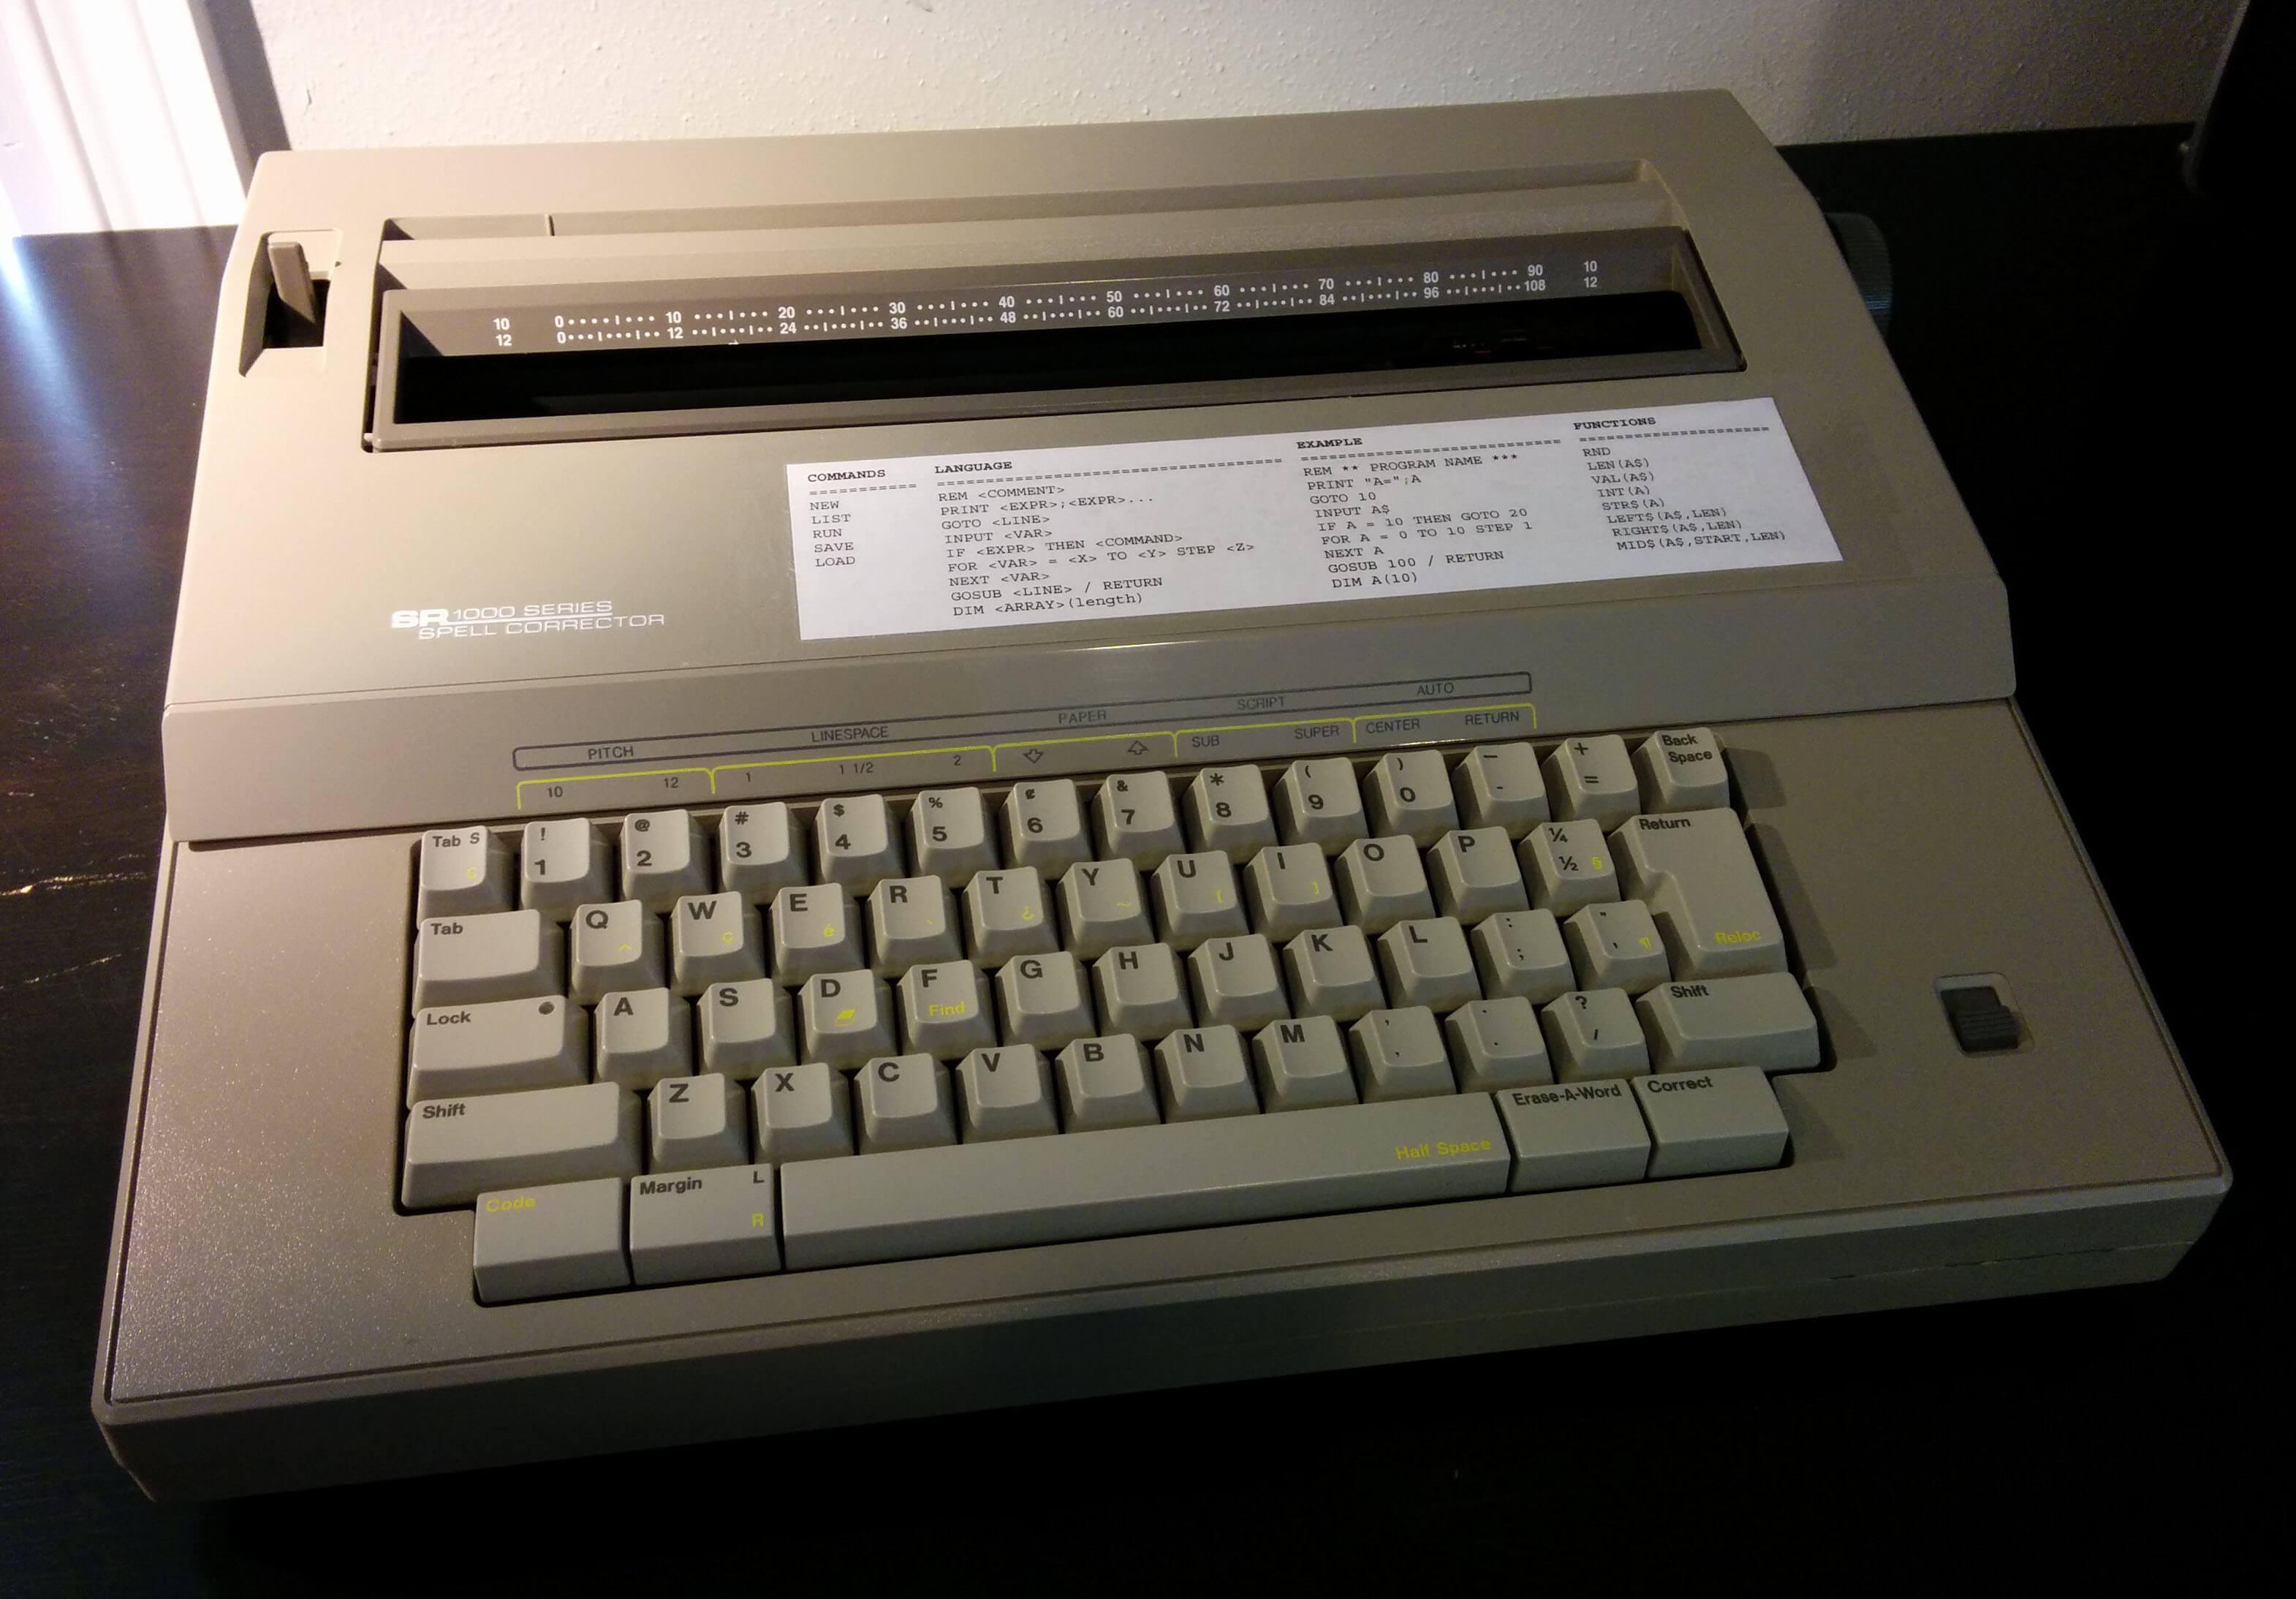
The finished programmable typewriter.
Demonstration
Here's a short video of entering, reading back, and running the quintessential BASIC program:
Reverse Engineering
This may not be a full writeup, but we can still make this a little educational! Here's the overall process that I followed, from start to finish:
- Remove the case from the typewriter.
- Immediately photograph the circuit board with my phone so that I don't forget where the connectors go.
- Feel slightly dismayed at how many signals it takes to drive a typewriter. There are definitely not enough pins on an Arduino for this.
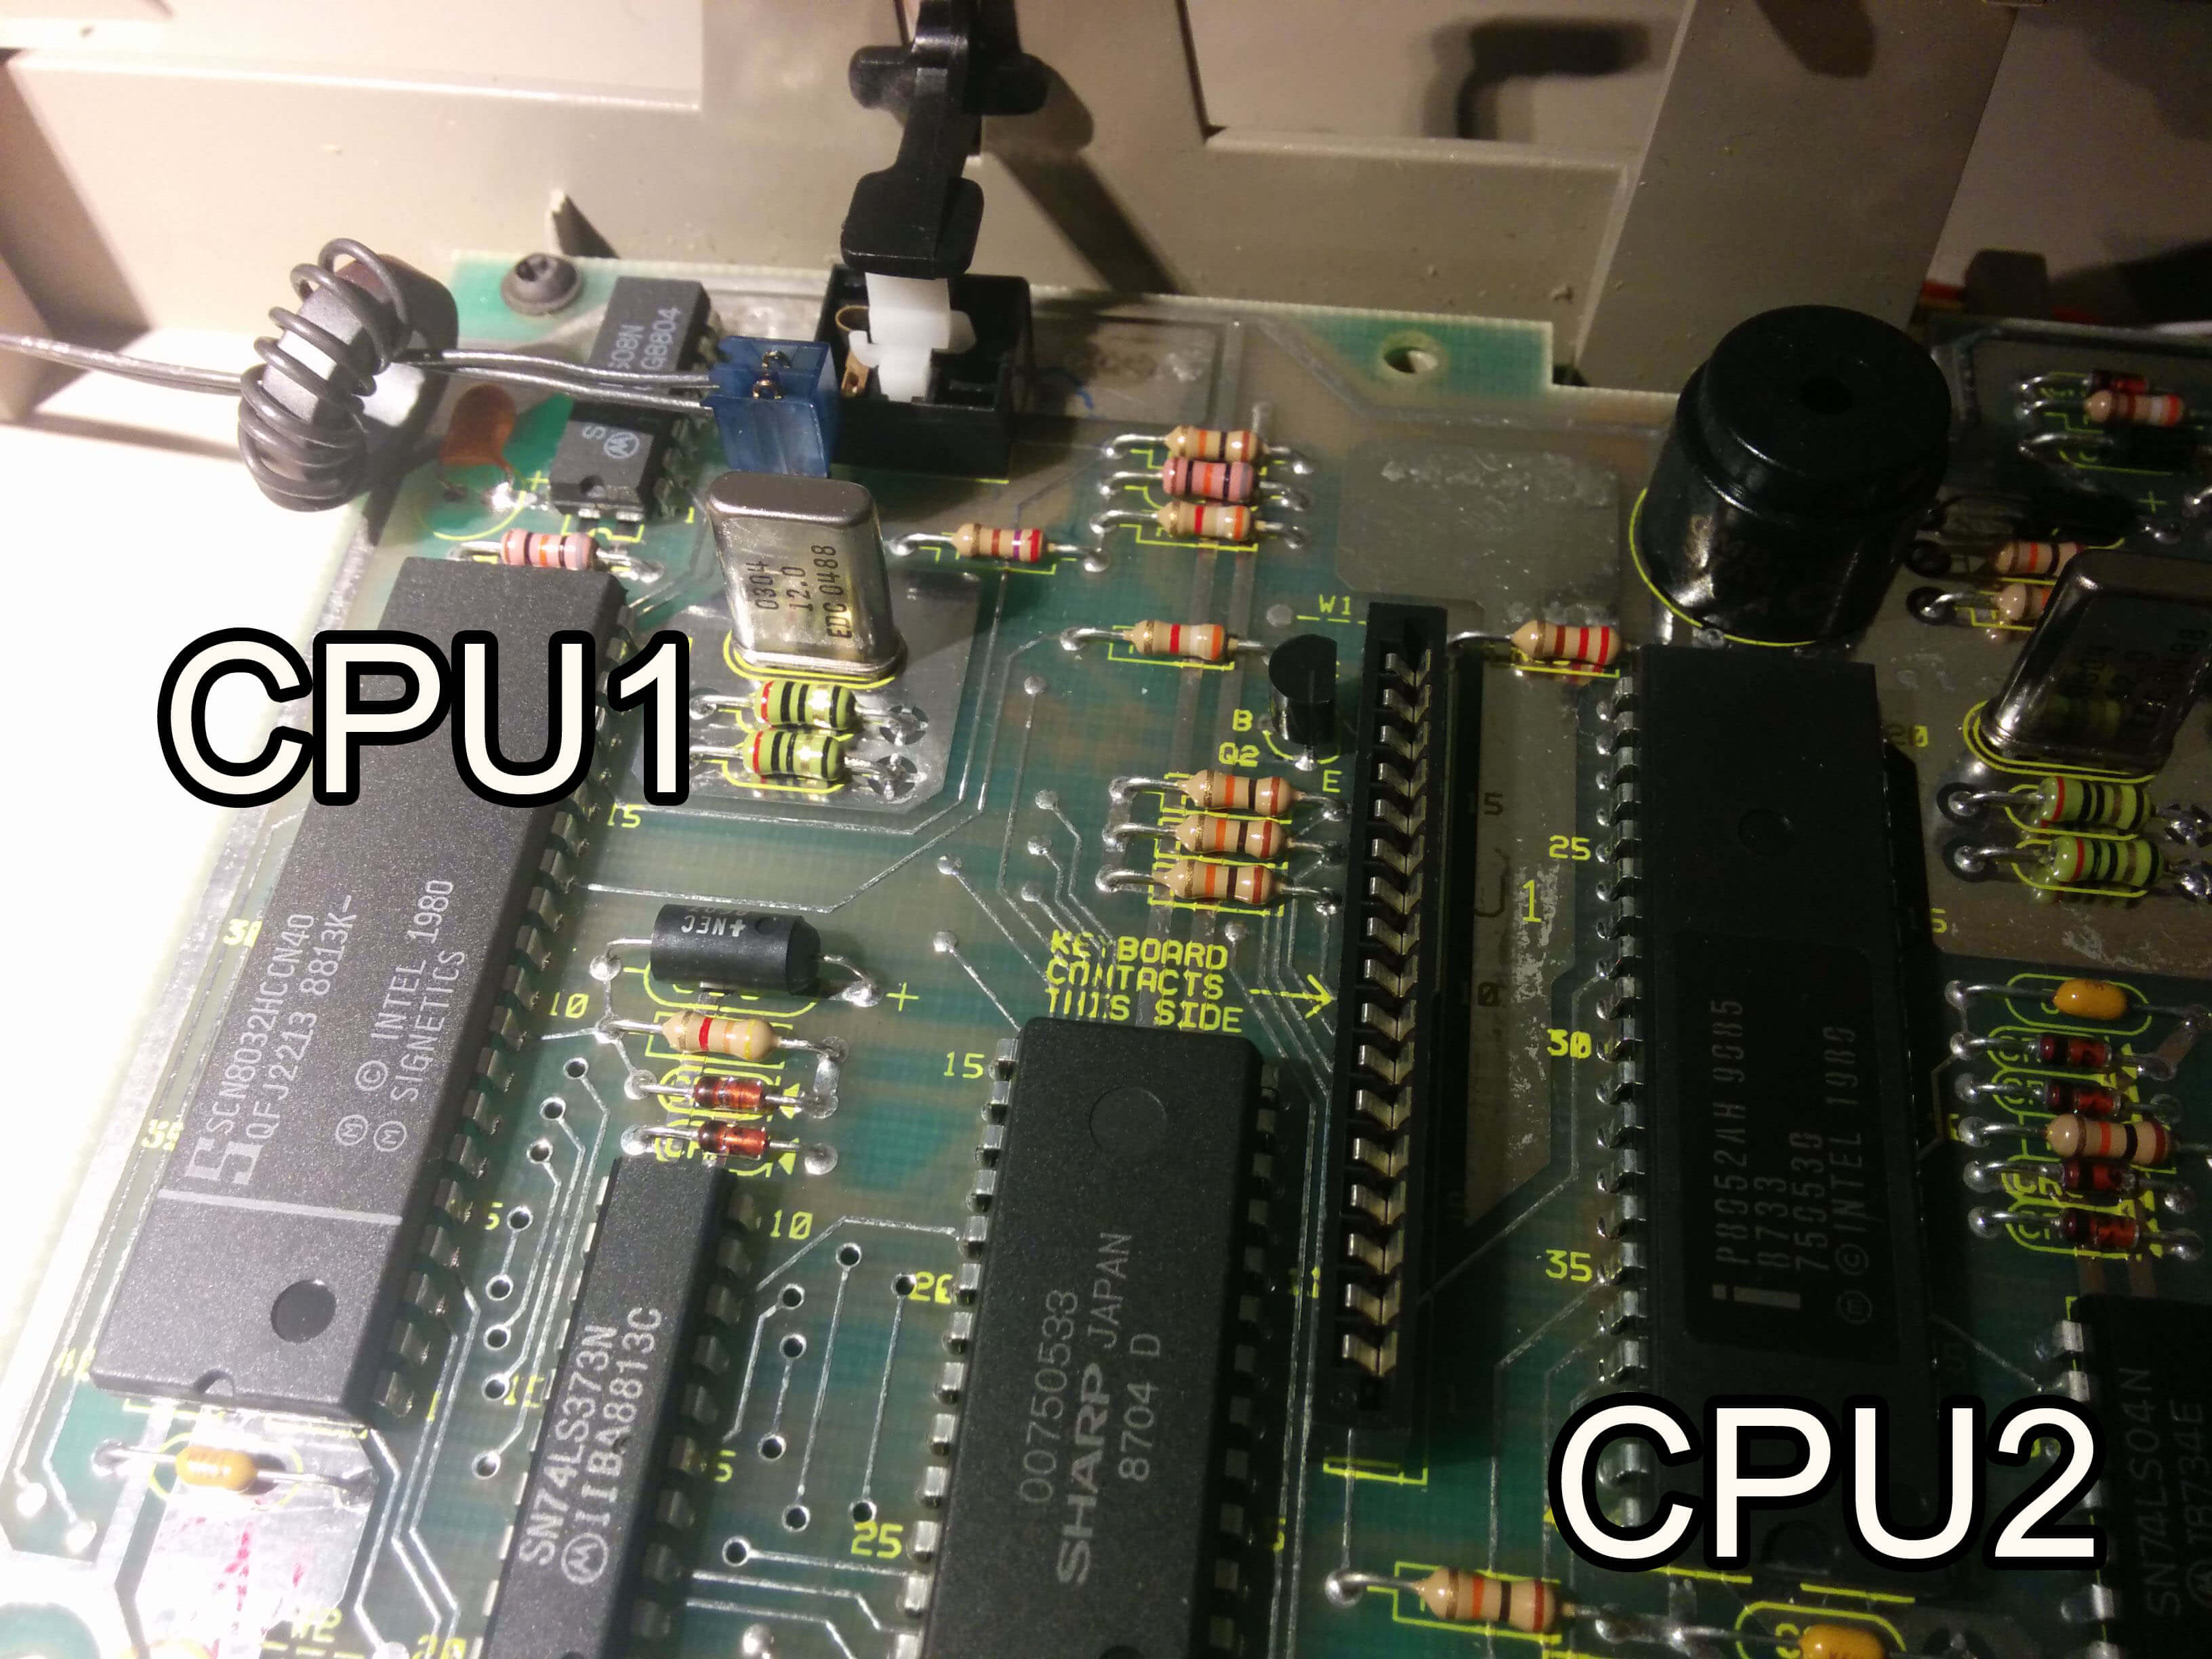
- Write down the part numbers for all the ICs and research them on the internet. There are a few logic chips, a few darlington arrays (for driving the motors and solenoids), what looks like a ROM (this typewriter evidently has spellcheck), and not one but two 8052-ish microcontrollers.
- Inspect the traces to get a vague idea of what connects to what. CPU1 connects to the ROM, while CPU2 connects to the keyboard and drivers.
- Find the two serial lines connecting the CPUs and get excited! Perhaps CPU1 is responsible for high-level control while CPU2 knows how to read the keyboard and drive the mechanical components? This would make it very easy to hack.
- Attach a $10 Chinese logic analyzer to the serial lines and watch the CPUs talk to each other at an unconventional 188 kBd. Feel like a character in a William Gibson book because you're using a $10 Chinese logic analyzer.
- Scribble down notes about the protocol after testing a bunch of different keys.
- Cut the serial lines to CPU1 and replace them with wires to connect to the Arduino.
- Program an Arduino to drive CPU2, but then discover that it responds with nothing but 0x00/0x40, which definitely didn't show up in any of the traces.
- Give up and go do something else for a few hours.
- Return and begrudgingly solder CPU1 back into the circuit.
- Run another signal trace and discover that the CPUs include a parity bit when talking to each other.
- Disconnect CPU1, reconnect the Arduino, and reconfigure the program to use parity. Rejoice when a character prints, but then discover that it won't print another character until the entire device is restarted.
- Make some educated guesses to figure out how to properly acknowledge commands, which fixes the hang after the first character.
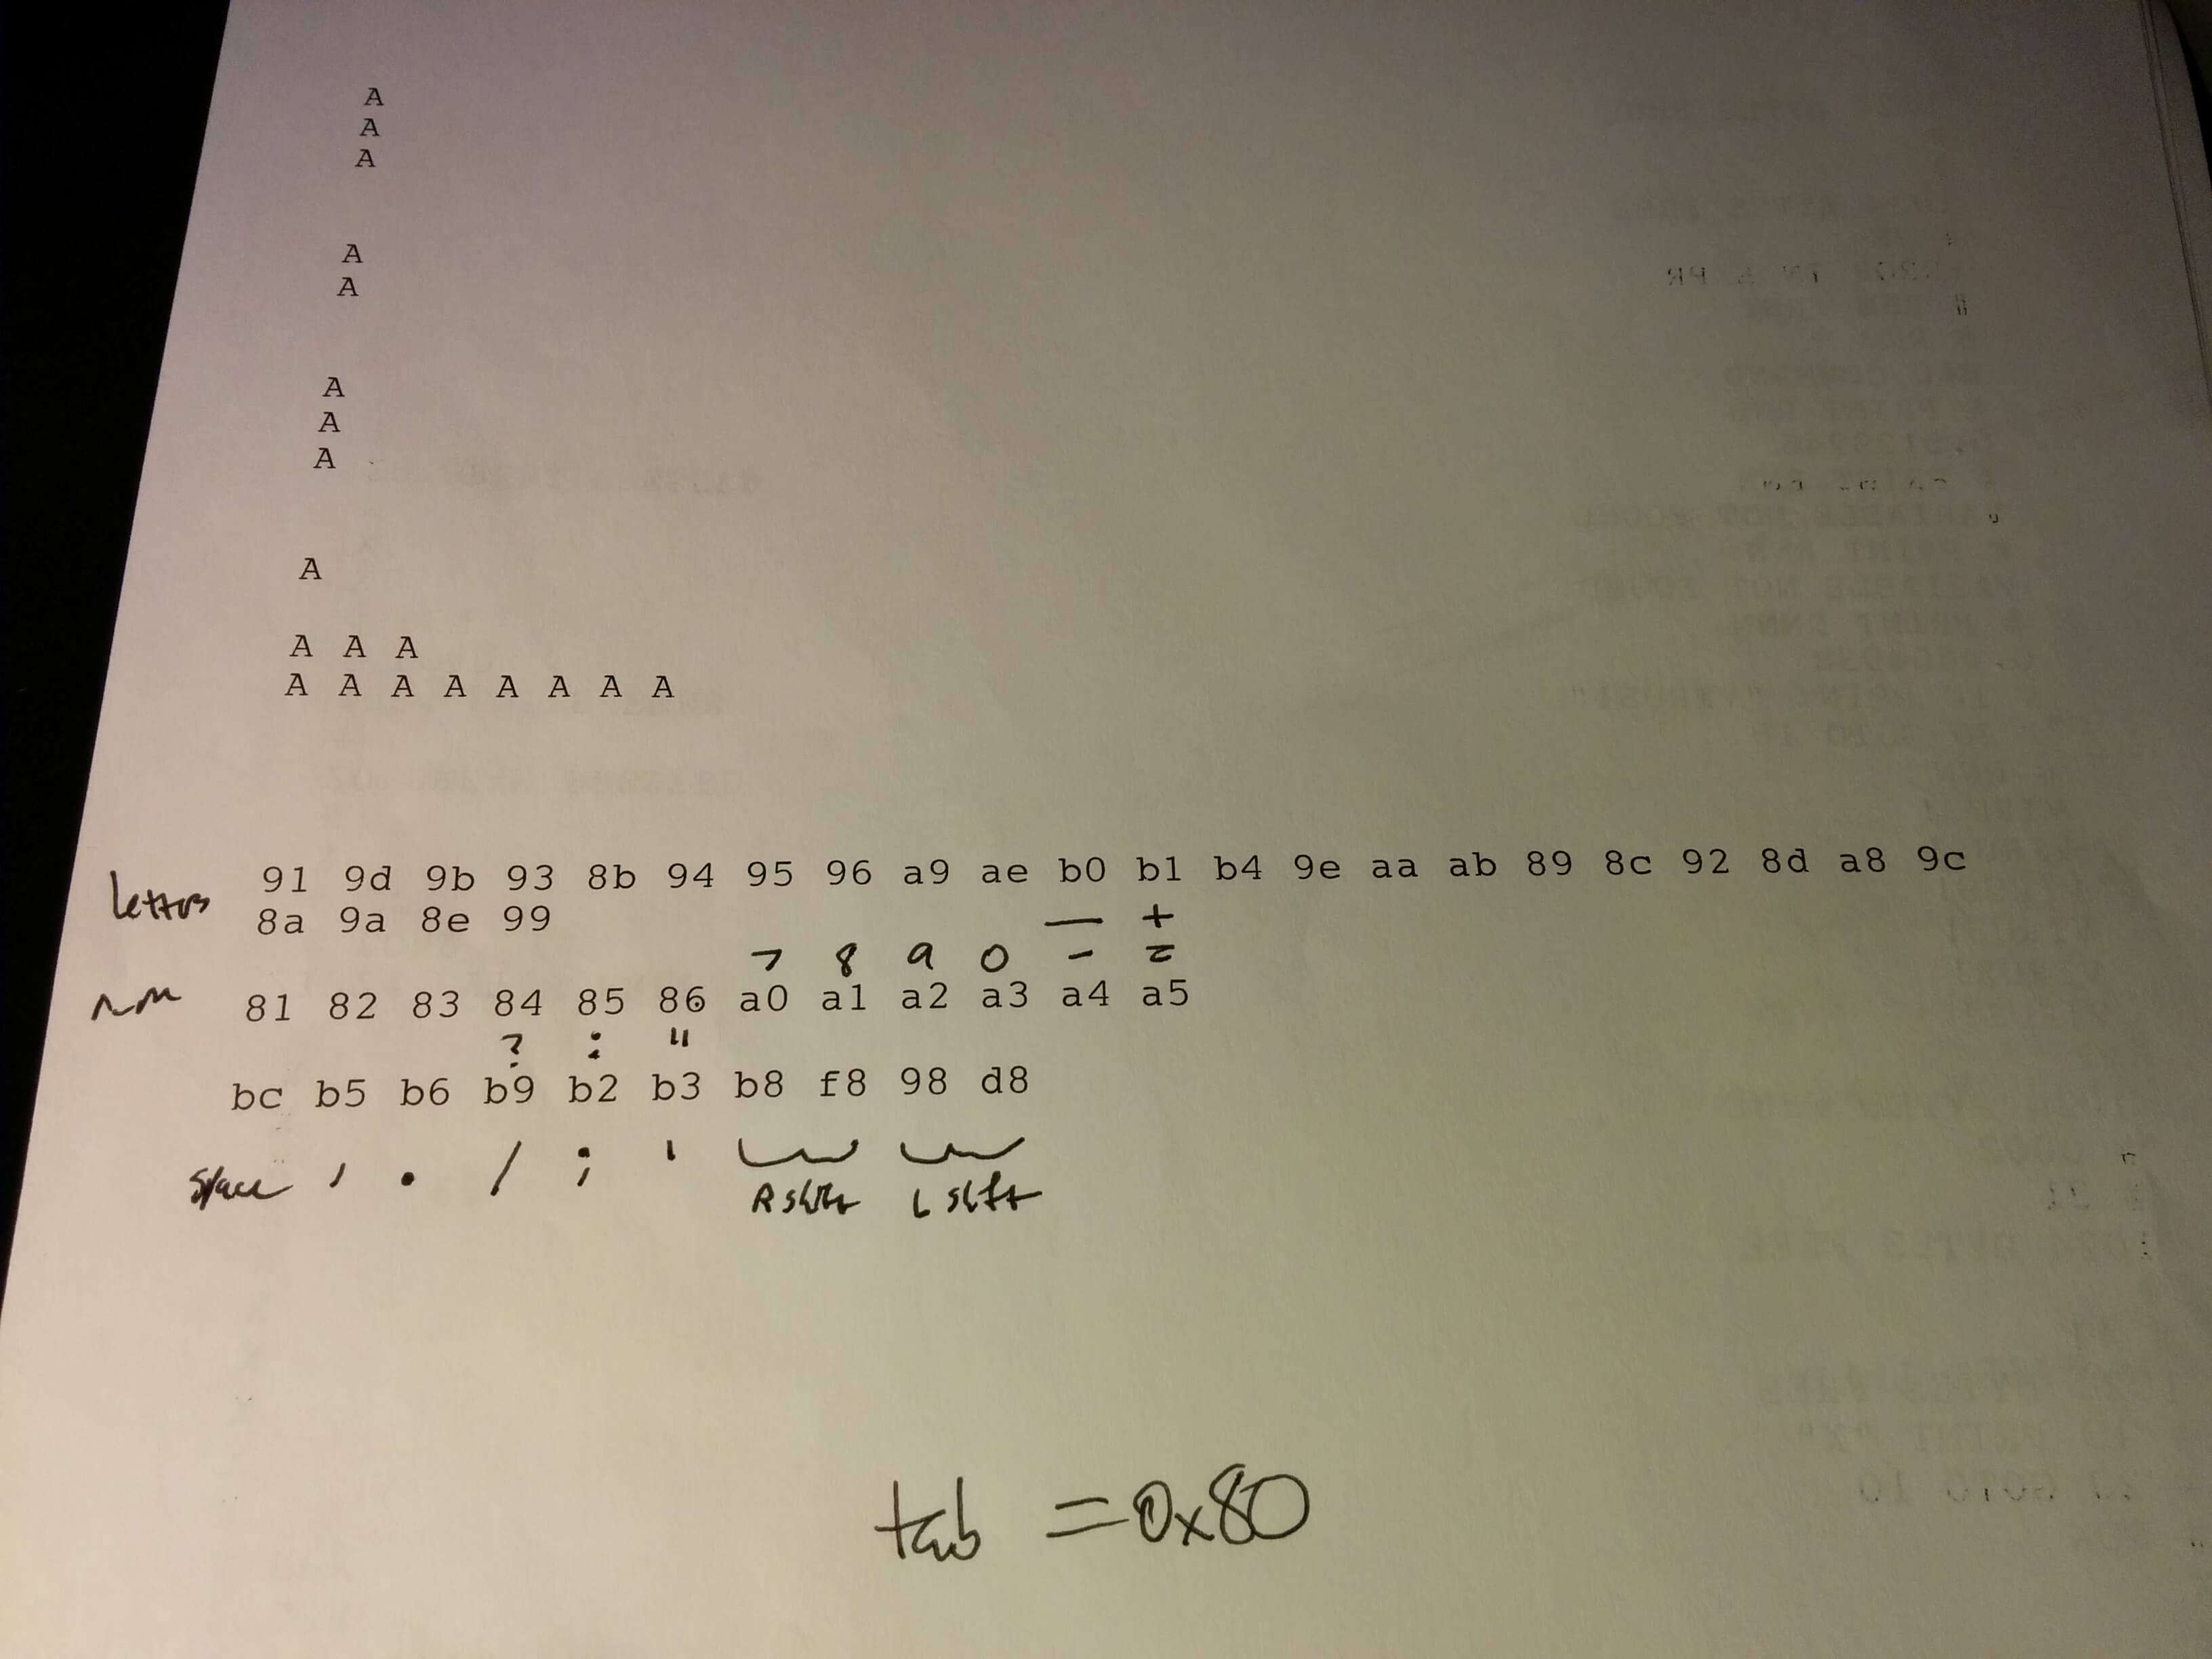
- Print out every possible character to figure out which numerical values correspond to which characters. Hint: it's definitely not ASCII.
- Press every key on the keyboard and print out the numerical values to figure out which values correspond to which keys. Hint: it's definitely not ASCII, and isn't even the same mapping from the previous step.
- Program the Arduino to echo what you type. Congratulations! You now have a typewriter! It's like you've made no progres at all!
- Find someone's amazing Arduino BASIC interpreter on GitHub and rewrite it to use your terrifying typewriter interface instead of a keyboard and LCD.
- Dremel out a hole for the Arduino's USB connector and hot glue everything back together.
- Create and attach a quick-reference card, because who actually remembers how to program in BASIC?
I'd share the source code for this project, but the beauty of it is that unless you happen to have a "SR1000 SERIES SPELL CORRECTOR" typewriter laying around it'd be absolutely useless to you! The good news is that Robin's BASIC interpreter (linked above) is well written and easy to repurpose for projects like this. What will you improve by adding a BASIC interpreter?
Some black pieces of plastic with lots of wires coming out of them that are stuck to a sheet of plastic?
It turns out that printers are pretty great output devices for debugging.

A quick-reference card seemed like a better solution than an ink-wasting HELP command.
Further Reading
When I'm not busy hacking things I make video games. If you liked reading about this, you'll probably like TIS-100, a programming puzzle game about writing assembly language for a fictional retrocomputer, the TIS-100. It's the assembly language programming game you never asked for!
If you're more interested in actual hacking, you might also like my writeup about hacking Yoda Stories, an old Star Wars game that I played as a kid.